


How to Add Products
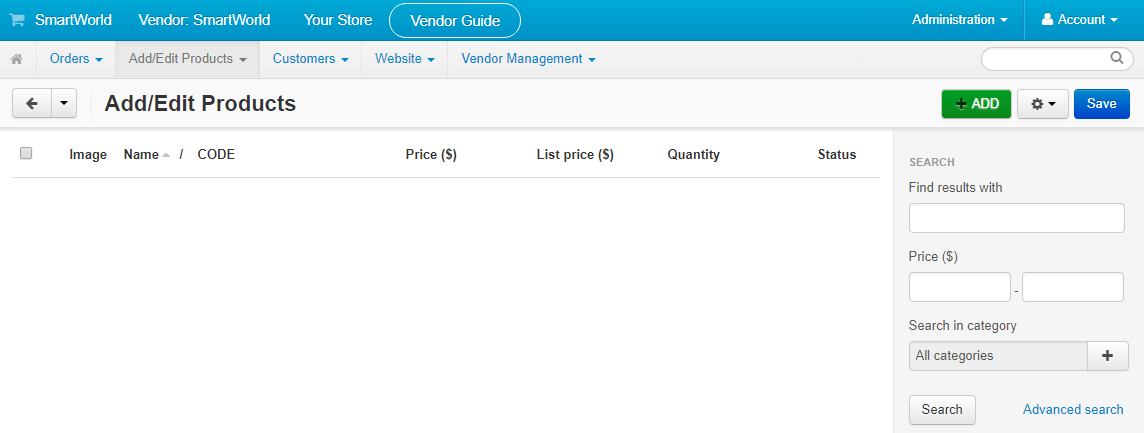
Individual Product Additions
To add a single product at a time, click the green "Add" button near the top right of the Add/Edit Products page.
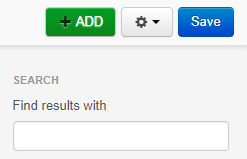
Bulk Product Additions
To add multiple products at once, click the grey gear icon near the top right of the Add/Edit Products page.
Note: If you use the bulk product uploader, you will have to add Product Options after creating the products.
Commonly Used Product Settings
Product Options
If your product has options, such as size or color, which the customer needs to select before checking out, there are two types of options: Simple Options and Configurable Options.
When creating a new product, there is an option called Product Type under the General tab. Select which product type you prefer for your options here:
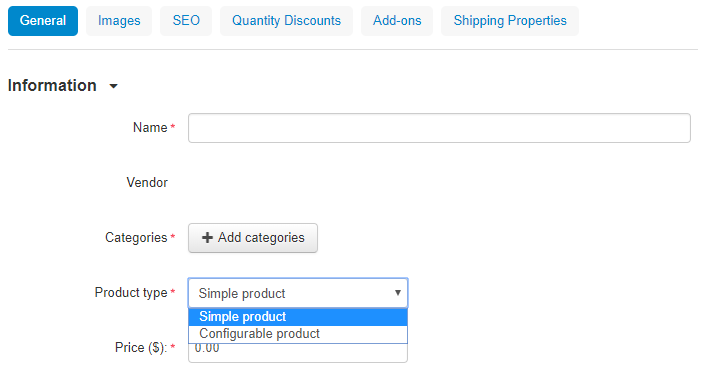
Once you have selected your Product Type, click the blue "Create" button near the top right
Note: You are able to change from a Simple Product type to a Configurable Product type at any time. However, you cannot switch a Configurable Product to a Simple one. Configurable Products are able to accomplish anything a Simple product can, but Simple products are more straightforward.
Simple Product Options
Simple Options allow you to add onto the base price of the product, while treating all options as the same product.
If you require individual SKU codes for your product options, we recommend using Configurable Product Options.
To add an option to a Simple product, navigate to the Options tab shown below:
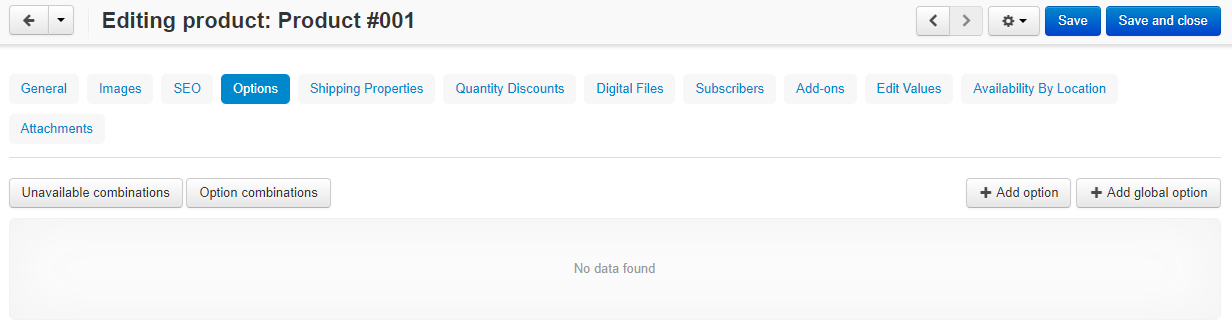
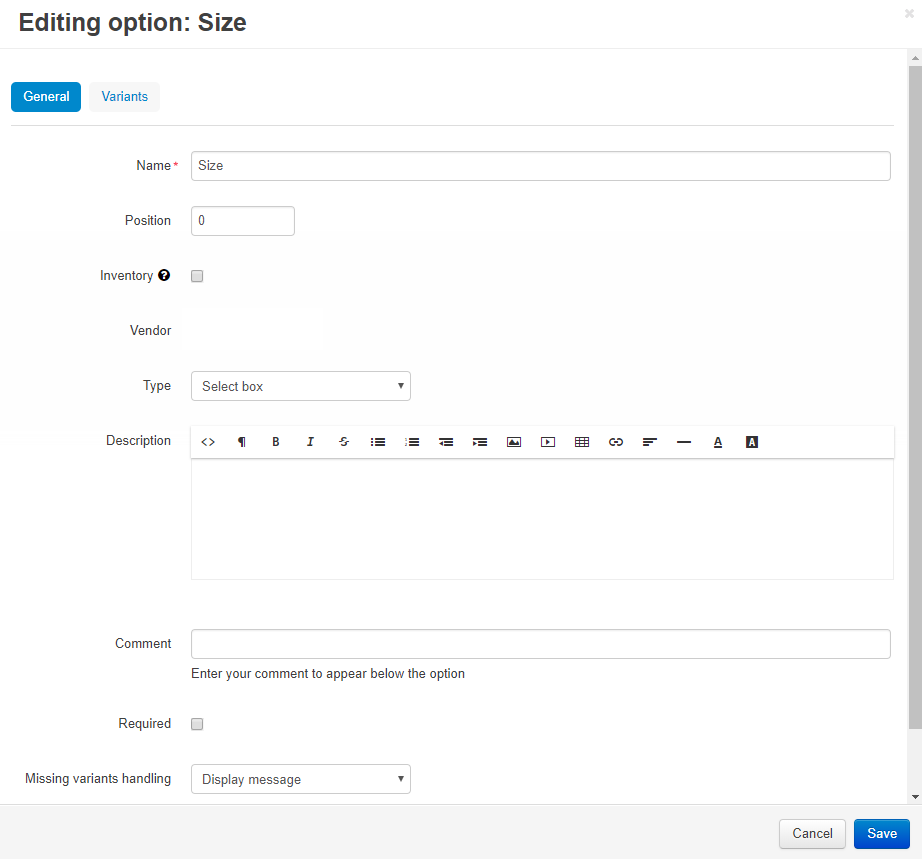
Click the "Add option" button to be greeted with the following popup screen:
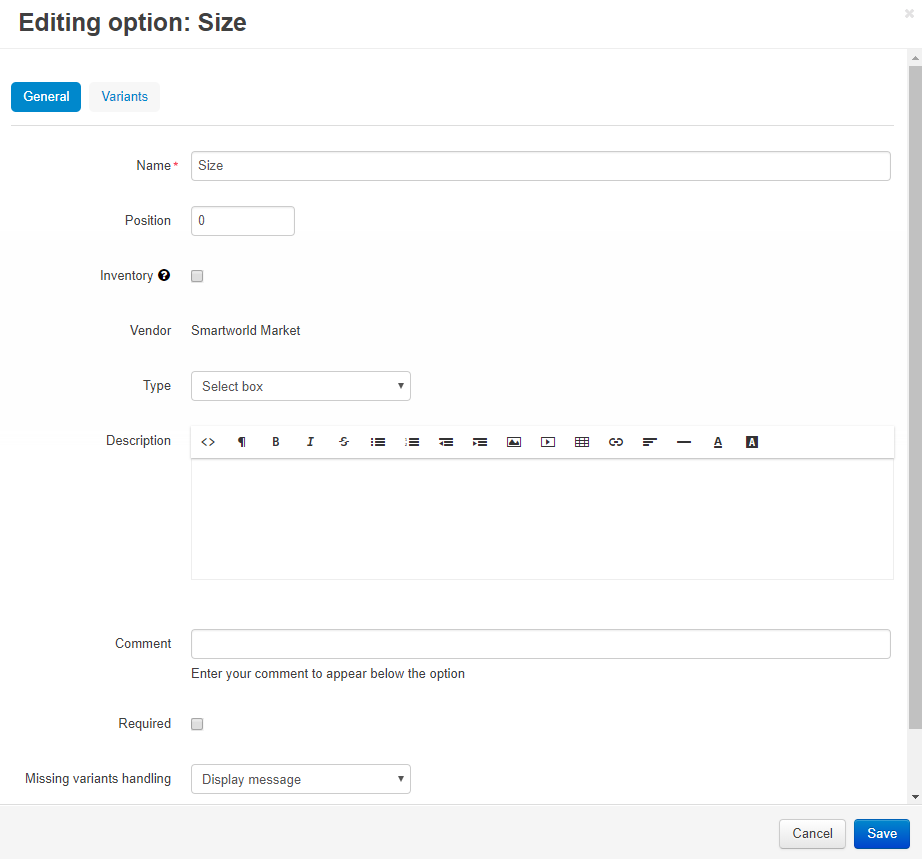
- The Name of the option will be the descriptor of the product options you are offering. For example, "Color" or "Size".
- The Position determines the order of multiple product options for a product. In other words, if you have "Size" set to 10 and "Color" set to 20, Size will display first and Color will display second on the product's page.
- The Inventory selection is available after initially saving the product option. Check this box to allow this product option to have different stock for each variant. For example: a red shirt can have 3 available, while a blue shirt has 2. Check this box to give unique SKU codes to product variations, as well. Adding the stock and unique SKU codes for a specific variant is part of the Option combination process described further down.
- The Type determines how the customer is able to select the product option. Select box is the standard drop down and select one option. Radio group is a list of bullet pointed options from which the customer can select one. Check box allows the customer to check multiple boxes. Text allows the customer to enter in a short, one line string of text. Text area is a larger box dedicated to allowing the customer to enter a lot of text. File allows the customer to attach a file to their purchase.
- The Description allows you to describe your product option that will be displayed next to the option's name in a ? bubble.
- The Comment is a brief amount of text displayed underneath the product option.
- Required determines whether or not the product option is required for purchasing or not.

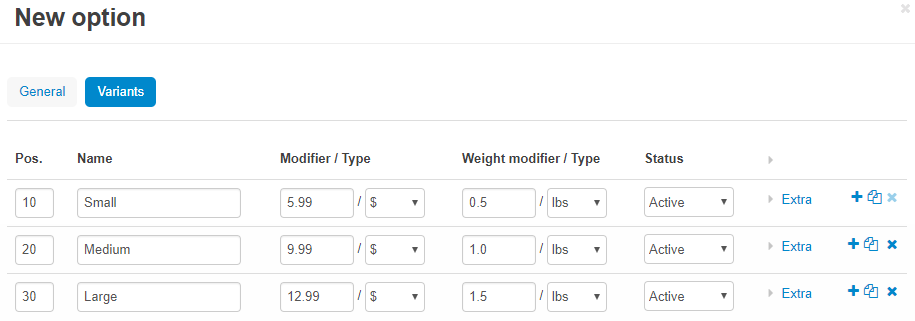
- The Pos. (Position) once again determines the order of multiple product variations.
- The Name is the name of the product variation that will display on the product's page. This can be "Red" for a Color option or "2 oz." for a Size option.
- The Modifier / Type is a way to adjust the price of the variant in conjunction with the base price. The first box allows you to enter a positive or negative numerical amount to adjust the base price. The second box allows you to decide whether or not the number is to be a fixed dollar amount, or a percentage of the base price.
- The Weight modifier / Type is a way to adjust the weight of the variant for shipping purposes. The first box allows you to enter a positive or negative numerical amount to adjust the base weight. The second box determines if the number is a fixed weight or a percentage.
- The Status determines whether or not the variant is Active (available on the storefront) or Disabled (unavailable on the storefront). This can be used to hide product variants you no longer offer, but may offer again in the future.
- Clicking the Extra text drops down an area where you can upload an icon to display on the product's page with the variant.
- The black + (Plus) allows you to add a new, blank product variant. The black Clone button to the right of the + (Plus) creates a copy of the current product variant. The X will show black when there are multiple product variants, allowing you to delete unnecessary variants.
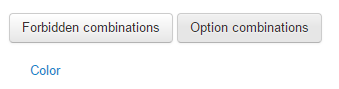
While editing options for a Simple product, you may have multiple product options with multiple variants but certain combinations are not what you offer. In this situation, after you have created all of your product options, you may set Forbidden combinations.
Note: The Exceptions type must be set to Forbidden in the General tab. If the Exceptions type is set to Allowed, this button will change to Allowed combinations. Using Allowed combinations, you restrict the product to allowing ONLY what combinations you set up (e.g. a combination of red and small will be the only shirt available for purchase). Setting up Allowed or Forbidden combinations is the same process, otherwise.
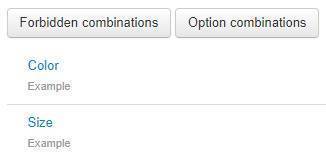
Click Forbidden combinations (or Allowed combinations) to see the following information:
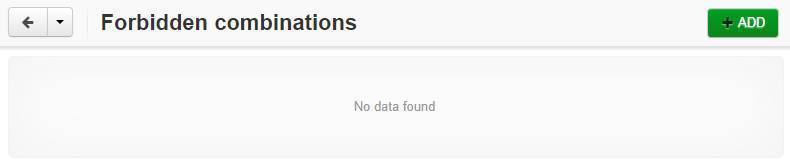
Any combinations you create will be found here. Clicking the ADD button near the top right will open the window below.
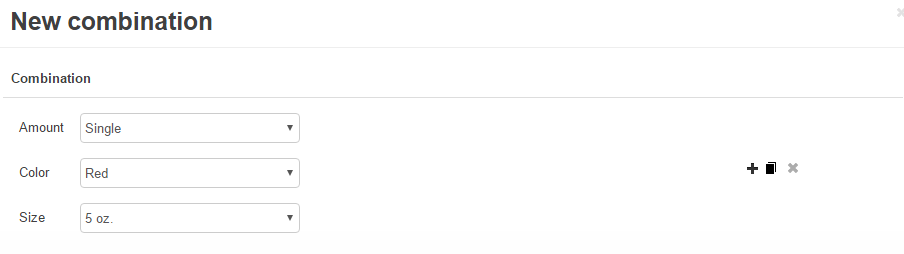
Your product options and their respective variations will be listed as potential combinations to forbid. You can choose from the drop down any one of the variants, all of them, or none from a particular option. The black + (Plus) creates a new forbidden combination. The black Clone button next to the + (Plus) creates a copy of the current combination. The X will show black when there are multiple combinations, allowing you to delete them when necessary.
Examples of forbidden combinations and their results are below:
- Amount: Single, Color: Red, Size: Any variant
Result: When the Single amount is selected, Red disappears from the list of Color options. - Amount: Single, Color: Red, Size: No variant can be selected.
Result: When the Single amount is selected, Red can be selected. When both are selected, no Size option can be selected. - Amount: Any variant, Color: No variant can be selected, Size: 5 oz.
Result: When 5 oz. is selected for Size, Color cannot be selected. Any Amount can be selected. - Amount: No variant can be selected, Color: Red, Size: No variant can be selected
Result: When Red is selected for Color, no variants can be selected for Amount AND Size.
Note: Combinations can get overly complex. It is recommended that you test your combinations to ensure the options available are correct.
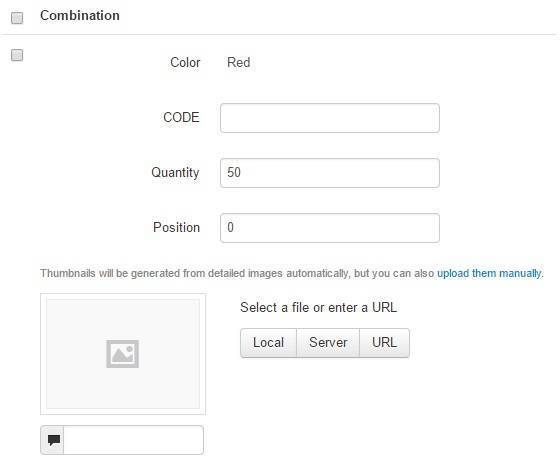
When you select the Inventory checkbox for a product option, you can manually adjust the SKU code, quantity, and icon of combinations in the Option combinations page under the Options tab.
In order to define the stock of a variant, you must go to the General tab of the product editing screen and select the Inventory option Track with options under Pricing / inventory.
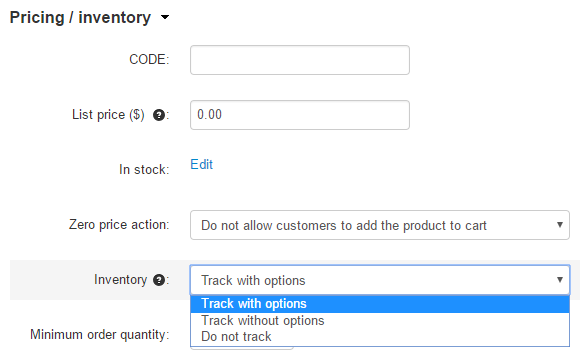
Note: You have to create at least one product option before you can select Track with options. Otherwise, this selection will not appear.
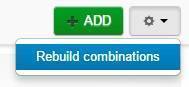
After doing so, return to the Options tab and select Option combinations.
Here, click the ADD button to individually create your own variation combinations or select the gear and Rebuild combinations to generate (or update) every possible combination available.
The following information will display for all product combinations created.
Configurable Product Options
Configurable Options treat options as individual products, allowing you to add unique SKU codes and prices to each option.
If you do not require an individual SKU code for each product option, Simple Product Options are suggested.
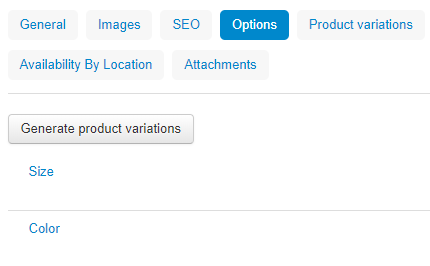
To add an option to a Configurable product, navigate to the Options tab shown below:
Click the "Add option" button to be greeted with the following popup screen:
- The Name of the option will be the descriptor of the product options you are offering. For example, "Color" or "Size".
- The Position determines the order of multiple product options for a product. In other words, if you have "Size" set to 10 and "Color" set to 20, Size will display first and Color will display second on the product's page.
- The Inventory selection is available after initially saving the product option. Check this box to allow this product option to have different stock for each variant. For example: a red shirt can have 3 available, while a blue shirt has 2. Check this box to give unique SKU codes to product variations, as well. Adding the stock and unique SKU codes for a specific variant is part of the Option combination process described further down.
- The Type determines how the customer is able to select the product option. Select box is the standard drop down and select one option. Radio group is a list of bullet pointed options from which the customer can select one. Check box allows the customer to check multiple boxes. Text allows the customer to enter in a short, one line string of text. Text area is a larger box dedicated to allowing the customer to enter a lot of text. File allows the customer to attach a file to their purchase.
- The Description allows you to describe your product option that will be displayed next to the option's name in a ? bubble.
- The Comment is a brief amount of text displayed underneath the product option.
- Required determines whether or not the product option is required for purchasing or not.
Note: While working with a configurable product, the most important part under the Variants tab is the Name. Position and Icon can be changed here if desired. Status and modifiers will be changed for configurable products in the next step.
The next step is to generate the variation combinations. This is accomplished by the Generate product variations button that now appears under the Options tab.
After clicking the button, you will see something similar to the following:
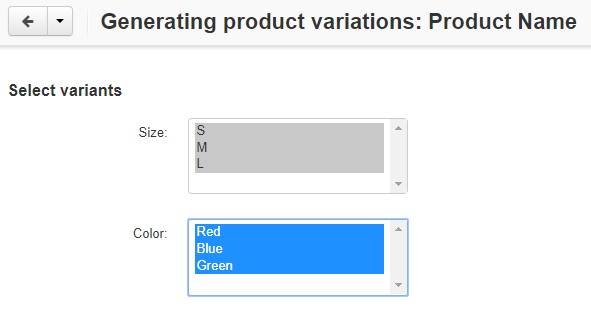
This screen allows you to select what variant combinations you wish to create.
Note: Click and drag or use CTRL+Shift to select multiple variant options in a row. Click while holding CTRL to select multiple variant options individually.
After clicking Next in the top right corner, you will be greeted with the following page:
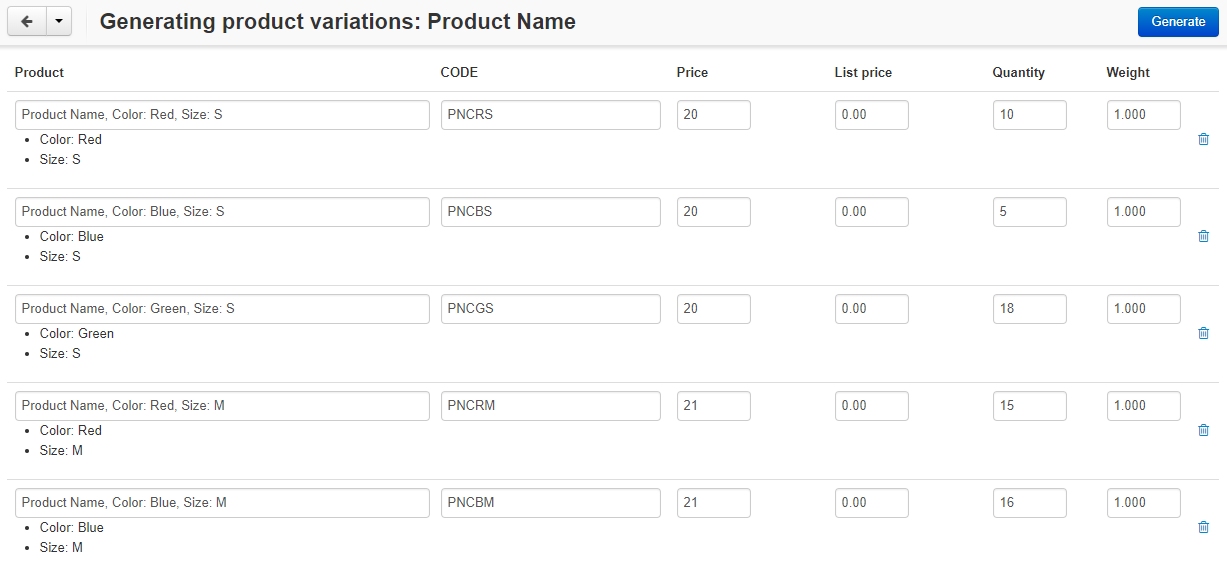
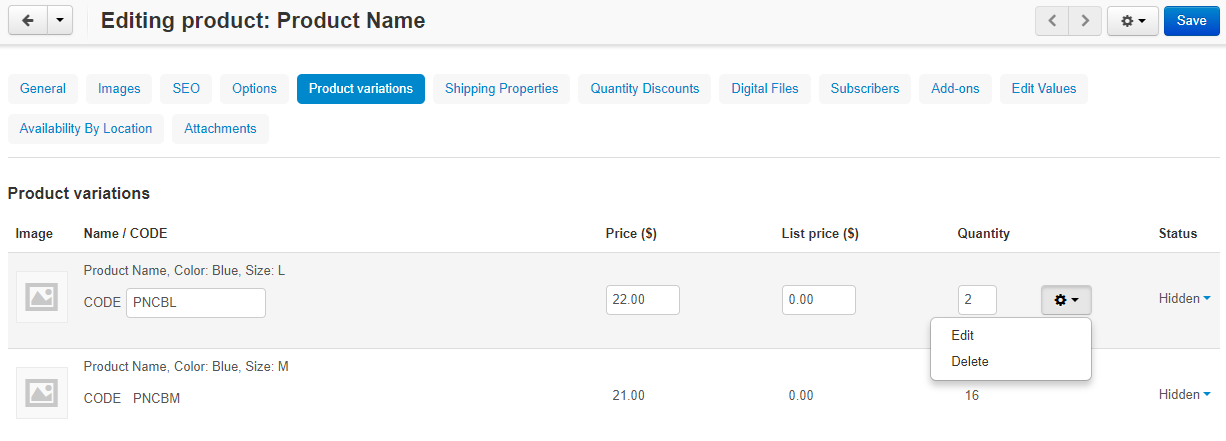
Here, you can give the variant a unique name, SKU code, price, MSRP (list price), inventory amount (quantity), and weight. Once you are done making changes, click the "Generate" button. The page that opens next will allow you to make any last minute modifications, and let you change the status of each individual product variation.
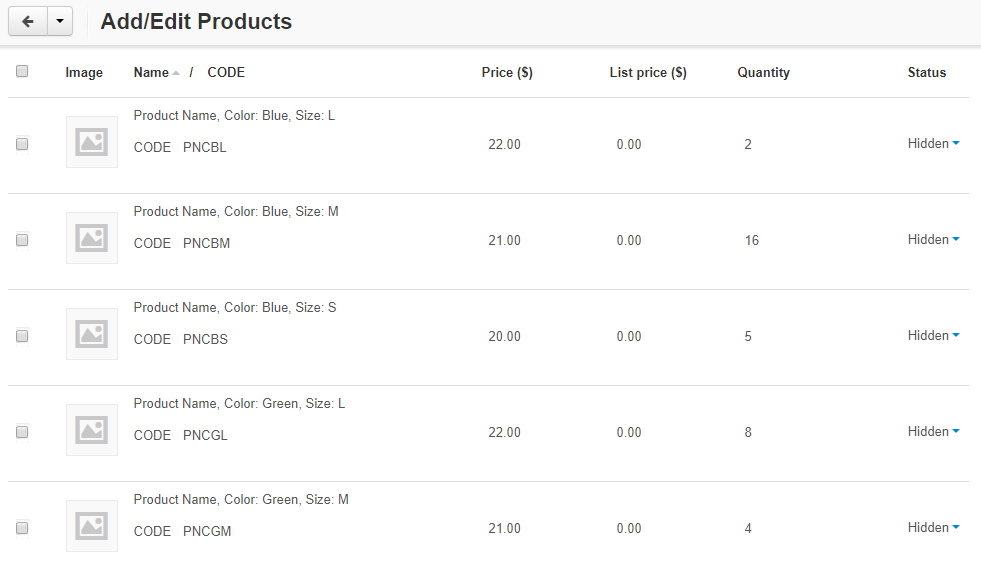
To make changes to product variations later, simply edit the product as you normally would and select the "Product Variations" tab.
Shipping Options
SmartWorld offers a variety of shipping options to fit your company's needs.
Smartworld Shipping
By default, products are set to be shipped using SmartWorld's shipping calculator and label. The label is available to be printed during the fulfillment process on SmartWorld, which is the next step you can read about here.
To edit an individual products' shipping, navigate to Add/Edit Products and click on the name of the product you wish to change. Note: When creating a new product, you must first click the blue Create button near the top right in order to edit shipping information.
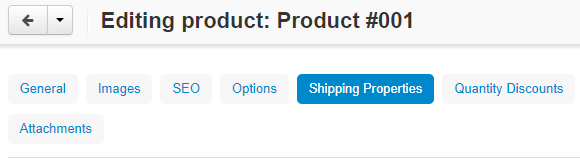
Click on the Shipping Properties tab while editing a product, as shown below:
The following shipping options are available for you to edit on an individual product basis:

The options listed under the General header are required for SW's automatic shipping calculator to accurately calculate the cost of shipping that the customer needs to pay for our label. The SmartWorld Shipping Options are additional options that modify how SW's system calculates shipping.
- Free Shipping - If this checkbox is selected, the customer does not pay for shipping. Note: A label is still generated using SW's system and is paid for with the vendor's part of the profits.
- USPS Priority Mail Flat Rate Options - Select a box size to charge flat rate shipping options.
- Use Custom Flat Rate Shipping - If this checkbox is selected, the Custom Flat Rate Shipping box below it allows you to set a fixed amount for shipping. Note: A label is still generated by SW's system. If the cost of shipping is calculated to more than the flat rate shipping collected from the customer, the difference is paid for with the vendor's part of the profit.
In-House Fulfillment
In-House Fulfillment does not automatically generate a label using SW's system. This allows you to fulfill the order as you normally would with the order information provided by SW.
To edit an individual products' shipping, navigate to Add/Edit Products and click on the name of the product you wish to change. Note: When creating a new product, you must first click the blue Create button near the top right in order to edit shipping information.
Click on the Shipping Properties tab while editing a product, as shown below:
The following shipping options are available for you to edit on an individual product basis:
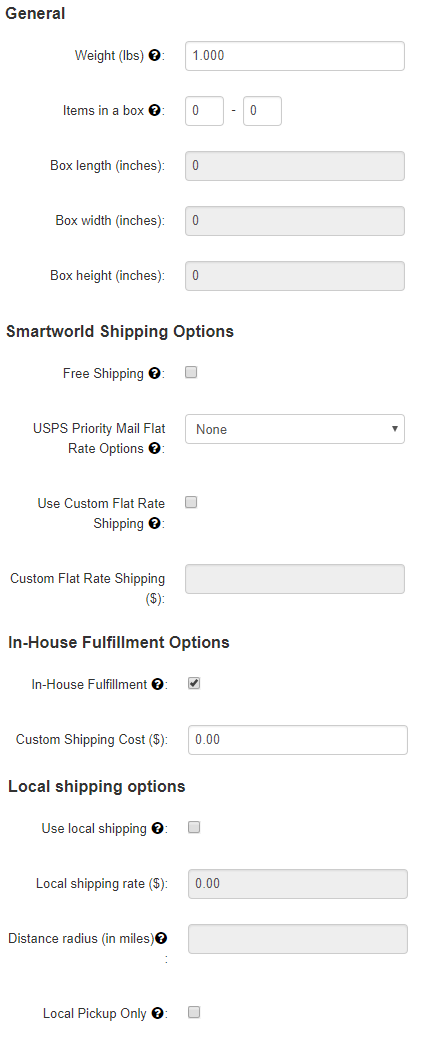
Under the In-House Fulfillment Options header, tick the checkbox and enter an amount into Custom Shipping Cost. This amount is what is charged to the customer at checkout for shipping. Note: To offer Free Shipping with In-House Fulfillment, simply set the Custom Shipping Cost to $0.00.
Local Shipping Options
Under the Local Shipping Options header, you may offer Local Delivery or Local Pickup Only.
- Local Delivery - To offer Local Delivery, tick the Use Local Shipping checkbox. Enter an amount into Local Shipping Rate to charge a delivery fee and a distance you deliver to in miles in the Distance Radius box.
- Local Pickup Only - If the customer has to come to you to pickup the product, tick the Local Pickup Only checkbox.
Global Shipping Options
To update all of your products' shipping options, click on the name of your store next to "Vendor:" in the blue bar at the top of the screen:

You will now be editing your vendor account on SmartWorld. You have two shipping options from here: free shipping by purchase amount (under the Purchase Amount tab) and Global In-House Shipping.
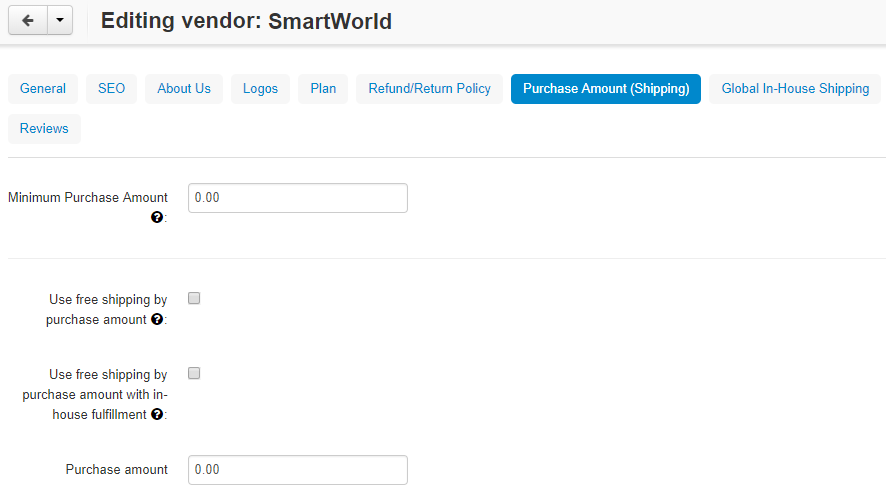
Tick the checkbox next to Use free shipping by purchase amount and enter a Purchase amount to allow free shipping whenever the customer purchases a certain monetary amount of your products. This free shipping by purchase amount generates a shipping label automatically and the cost of the label is either paid for by the customer or the vendor (depending on if the free shipping quota has been met).
Tick the checkbox next to Use free shipping by purchase amount with in-house fulfillment and enter a Purchase amount to allow free shipping whenever the customer purchases a certain monetary amount of your products. This method will not generate a shipping label automatically with the SW system and must be fulfilled with your own shipping methods.
For an in-depth breakdown on every part of the Add/Edit Products section, please see this page on the subject.